Compost That Works in a Small Garden
Make useful garden compost in a small space by balancing ingredients, moisture and access, then giving the finished batch time to mature.
Updated

Mix moist plant waste with dry structural ingredients, maintain damp but aerated conditions, and use mature compost as a soil improver.
A useful destination for ordinary garden waste
In a small garden, composting works best when the bin fits the way you actually produce and handle waste. The goal is a dark, crumbly soil improver made from decomposed plant material. It is not the same as the packaged growing medium used to fill seed trays or houseplant pots. Finished home compost is valuable spread over garden soil, but an unpredictable homemade mix is a poor place to begin delicate seedlings. Keeping that distinction clear prevents disappointment at both ends of the process.
A modest bin receiving a little material each week will usually decompose more slowly and less uniformly than a carefully managed hot pile. That is acceptable. You do not need to buy accelerators or chase high temperatures to obtain useful compost. You do need a sensible balance of ingredients, some air and enough moisture for decomposing organisms. Think of the bin as a working habitat rather than a rubbish container whose contents improve simply because the lid is closed.
Pick a location you will use in winter
Choose a place you can reach with a bucket when the ground is wet. A bin hidden behind dense shrubs may be discreet, but awkward access encourages kitchen scraps to collect indoors or get dumped in a thick layer. Leave enough space to remove finished material through the opening you intend to use. Check the manufacturer's instructions for the base and ventilation; different enclosed bins have different designs.
Where practical, contact with soil allows organisms to move into the contents and liquid to disperse appropriately. On paving, an enclosed system may still be possible, but the site needs a suitable drainage plan and should not leak onto a neighbour's property. Avoid putting the bin directly against a wooden structure that could remain damp. A little shade can reduce drying, while an exposed position may require more frequent moisture checks in hot weather.
Keep browns beside the bin
Most households produce soft, moist material more regularly than dry, fibrous material. Vegetable peelings, fresh grass and tender plant growth are useful green ingredients. Torn plain cardboard, dry leaves and small woody trimmings provide a different texture and help keep the mixture from collapsing. Save a bag of suitable dry material next to the bin so that adding kitchen waste automatically includes something that introduces structure.
Do not treat the green and brown labels as literal colours. Coffee grounds are dark but behave differently from dry wood chips. Fresh grass can mat together even when it looks loose in the mower box. A rough volume balance is a convenient starting point, but the appearance, smell and feel of the contents tell you whether to adjust. A compact wet mass needs more dry, open material and mixing; a crisp, unchanged pile may need moisture and softer ingredients.
Prepare ingredients without making another job
Break cardboard into hand-sized pieces and chop very long stems so that they mix. There is little advantage in turning every contribution into confetti, especially if doing so makes composting too time-consuming to continue. Thick branches take longer than soft leaves. Keep them out of a small general bin unless they are shredded or you are willing to sift them out later. A separate brush pile can provide useful habitat where space and local conditions permit.
Spread grass clippings in thin, mixed additions. A large load tipped in at once can form a dense, airless slab. If mowing produces far more grass than the bin can accommodate, leave suitable clippings on the lawn or use another locally appropriate disposal route. Likewise, do not bury a whole bowl of fruit waste in one spot. Mix it through the upper layer with dry ingredients so that it is less inviting to flies and decomposes more evenly.
Know what belongs elsewhere
A basic garden compost bin is not a reliable treatment for meat, fish, dairy, greasy cooked food or pet faeces. These materials create avoidable pest and hygiene problems in an ordinary cold pile. Keep them out unless you are using a system explicitly designed and managed for them. Cat litter and dog waste should not enter compost destined for ordinary garden use. Do not assume that a product labelled biodegradable will break down in a cool home bin.
Persistent weed roots and mature weed seeds also deserve caution. A slowly decomposing bin may not kill them. Put invasive plants, serious plant disease material and residues of uncertain chemical treatment through the disposal route recommended by local authorities or horticultural guidance. Composting is valuable, but it should not become a way to spread a difficult problem across the rest of the garden. When a plant identification is uncertain, resolve that before shredding it into every batch.
Adjust moisture with a handful of evidence
Take a small sample from below the exposed surface while wearing gloves. The material should feel damp rather than dusty or dripping. If it falls apart as dry flakes and seems unchanged for weeks, add water gradually as you mix. A single flood often runs down channels without wetting the interior evenly. In a very rainy climate, a suitable lid prevents the bin becoming waterlogged while its designed vents still admit air.
If the contents are soggy, add dry structural material and open the mass with a fork or compost aerator. Protect your hands and work within a comfortable lifting range. Turning should redistribute ingredients, not pack them down. You do not need to empty the entire bin every weekend. For a small continuous bin, periodically mixing the upper material and allowing an older lower section to finish may be a more workable routine.
Use smell to choose the next action
A healthy decomposing mixture may smell earthy or mildly vegetal when opened. A strong sour or rotten smell commonly points to too much moisture, insufficient air or a dense pocket of food waste. The response is to correct that structure, not perfume the bin or pour in cleaning products. Add dry browns, break up clumps and check that rain is not entering continuously through a damaged lid.
An ammonia smell can accompany a very nitrogen-rich mixture such as a large mass of grass. Blend in carbon-rich dry ingredients and avoid adding more of the same material until the balance improves. If the bin looks almost exactly as it did months ago, inspect moisture before concluding that it needs a commercial starter. Cold weather also slows activity. A winter pause does not mean the organisms have disappeared or the system has failed.
Manage visitors and nuisances
Small flies can appear around exposed fruit and vegetable scraps. Cover fresh additions with a mixed layer of existing material and browns, keep the kitchen caddy clean and avoid leaving overripe fruit on top. An intact lid and correctly fitted base reduce opportunities for larger animals. If rodents are present, stop adding attractive food waste while you investigate access and seek appropriate local advice. Do not scatter poisons into the compost.
Worms, woodlice and other small decomposers are usually part of the process rather than a reason to sterilize the bin. Handle compost hygienically, cover cuts, wash hands afterwards and avoid breathing clouds of dry material. If you have a condition that makes handling decomposing organic matter risky, get suitable health advice and use a lower-exposure method. Dampening dusty material before moving it can make the job more comfortable, without turning the whole batch into sludge.
Give one batch a chance to finish
A bin that receives fresh waste forever contains material at several stages. To obtain a more uniform product, stop filling one compartment and use a second container or temporary holding area. If space permits only one bin, remove a mature lower portion and return visibly fresh pieces to the working section. Keep twig fragments for the next batch; they can help preserve air spaces.
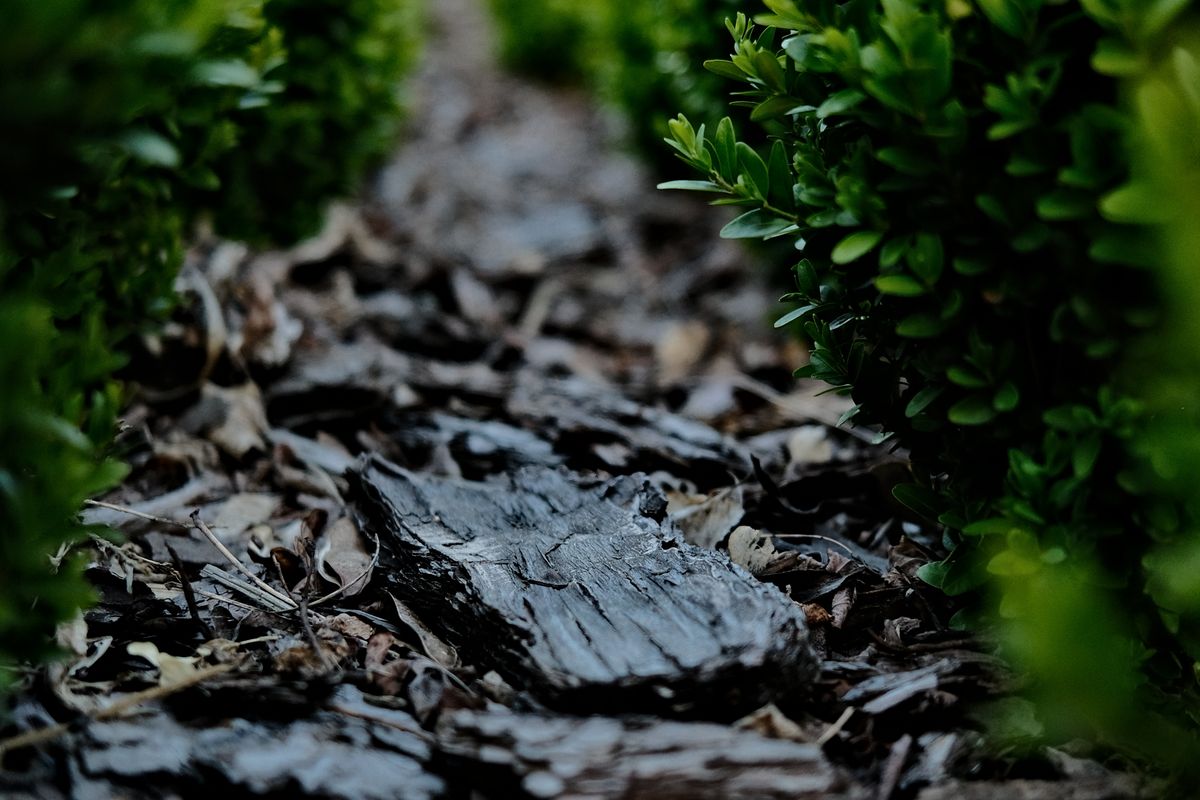
Judge readiness by the material rather than a promised number of weeks. Finished compost is generally dark and crumbly, with an earthy smell and few recognizable soft ingredients. It should no longer resemble a bowl of recent kitchen waste. Some woody pieces will remain and can be screened out for fine surface uses. If a batch is still heating after mixing or contains many fresh fragments, let it mature before placing it close to tender roots.
Put the result where it is most useful
Spread finished compost as a surface soil improver around established garden plants, keeping it away from stems and crowns. You can also incorporate appropriate material when preparing an unplanted bed, provided the soil is workable. It contributes organic matter and supports soil structure, but its nutrient content is variable. Do not assume it replaces every fertilizer requirement or corrects every soil problem. A struggling plant may need a different location rather than more compost.
Record the approximate amount the bin produces in a year. That helps you decide whether a second bin would be worthwhile or simply occupy valuable space. In many small gardens, the strongest system is uncomplicated: a nearby supply of dry material, modest mixed additions, a moisture check and a period of finishing. The reward is not only the compost itself. Less plant waste leaves the garden, and the soil receives a useful product made from its own ordinary seasonal surplus.
Keep a little of the finished material available for comparison with the next batch. Its loose texture and woodland smell provide a practical reference when you are deciding whether a newer mixture has matured enough to use.
Further reading
Use these independent resources to explore the subject and check guidance for your location.